Creating SpatRaster objects
A SpatRaster can easily be created from scratch using the function
rast. The default settings will create a global raster data
structure with a longitude/latitude coordinate reference system and 1 by
1 degree cells. You can change these settings by providing additional
arguments such as xmin, nrow, ncol, and/or crs, to the
function. You can also change these parameters after creating the
object. If you set the projection, this is only to properly define it,
not to change it. To transform a SpatRaster to another coordinate
reference system (projection) you can use the function warp.
Here is an example of creating and changing a SpatRaster object ‘r’
from scratch.
SpatRaster with default geometry parameters
library(terra)
## terra 1.9.21
x <- rast()
x
## class       : SpatRaster
## size        : 180, 360, 1  (nrow, ncol, nlyr)
## resolution  : 1, 1  (x, y)
## extent      : -180, 180, -90, 90  (xmin, xmax, ymin, ymax)
## coord. ref. : lon/lat WGS 84 (CRS84) (OGC:CRS84)
With other parameters
x <- rast(ncol=36, nrow=18, xmin=-1000, xmax=1000, ymin=-100, ymax=900)
res(x)
## [1] 55.55556 55.55556
Change the spatial resolution of an existing object
res(x) <- 100
res(x)
## [1] 100 100
ncol(x)
## [1] 20
# change the numer of columns (affects resolution)
ncol(x) <- 18
ncol(x)
## [1] 18
res(x)
## [1] 111.1111 100.0000
Set the coordinate reference system (CRS) (define the projection)
crs(x) <- "+proj=utm +zone=48 +datum=WGS84"
x
## class       : SpatRaster
## size        : 10, 18, 1  (nrow, ncol, nlyr)
## resolution  : 111.1111, 100  (x, y)
## extent      : -1000, 1000, -100, 900  (xmin, xmax, ymin, ymax)
## coord. ref. : +proj=utm +zone=48 +datum=WGS84 +units=m +no_defs
The object x created in the example above only consist of a
“skeleton”, that is, we have defined the number of rows and columns, and
where the raster is located in geographic space, but there are no
cell-values associated with it. Setting and accessing values is
illustrated below.
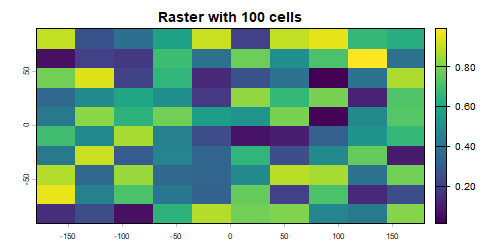
r <- rast(ncol=10, nrow=10)
ncell(r)
## [1] 100
hasValues(r)
## [1] FALSE
# use the 'values' function, e.g.,
values(r) <- 1:ncell(r)
# or
set.seed(0)
values(r) <- runif(ncell(r))
hasValues(r)
## [1] TRUE
sources(r)
## [1] ""
values(r)[1:10]
##  [1] 0.8966972 0.2655087 0.3721239 0.5728534 0.9082078 0.2016819 0.8983897
##  [8] 0.9446753 0.6607978 0.6291140
plot(r, main='Raster with 100 cells')
In some cases, for example when you change the number of columns or
rows, you will lose the values associated with the SpatRaster if
there were any (or the link to a file if there was one). The same
applies, in most cases, if you change the resolution directly (as this
can affect the number of rows or columns). Values are not lost when
changing the extent as this change adjusts the resolution, but does not
change the number of rows or columns.
hasValues(r)
## [1] TRUE
res(r)
## [1] 36 18
dim(r)
## [1] 10 10  1
xmax(r)
## [1] 180
# change the maximum x coordinate of the extent (bounding box) of the SpatRaster
xmax(r) <- 0
hasValues(r)
## [1] TRUE
res(r)
## [1] 18 18
dim(r)
## [1] 10 10  1
ncol(r) <- 6
hasValues(r)
## [1] FALSE
res(r)
## [1] 30 18
dim(r)
## [1] 10  6  1
xmax(r)
## [1] 0
The function terra also allows you to create a SpatRaster from
another object, including another SpatRaster, or SpatRaster
objects from the “terra” package.
It is more common, however, to create a SpatRaster object from a
file. The terra package can use raster files in several formats,
including some ‘natively’ supported formats and other formats via the
rgdal package. Supported formats for reading include GeoTIFF, ESRI,
ENVI, and ERDAS. Most formats supported for reading can also be written
to.
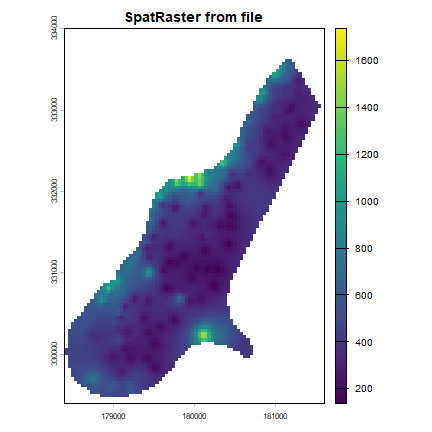
# get the name of an example file installed with the package
# do not use this construction of your own files
filename <- system.file("ex/meuse.tif", package="terra")
filename
## [1] "C:/soft/R/R-4.5.3/library/terra/ex/meuse.tif"
r <- rast(filename)
sources(r)
## [1] "C:/soft/R/R-4.5.3/library/terra/ex/meuse.tif"
hasValues(r)
## [1] TRUE
plot(r, main='SpatRaster from file')
Multi-layer objects can be created in memory (from SpatRaster
objects) or from files.
# create three identical SpatRaster objects
r1 <- r2 <- r3 <- rast(nrow=10, ncol=10)
# Assign random cell values
values(r1) <- runif(ncell(r1))
values(r2) <- runif(ncell(r2))
values(r3) <- runif(ncell(r3))
Combine the three SpatRaster objects into a single object with three layers.
s <- c(r1, r2, r3)
s
## class       : SpatRaster
## size        : 10, 10, 3  (nrow, ncol, nlyr)
## resolution  : 36, 18  (x, y)
## extent      : -180, 180, -90, 90  (xmin, xmax, ymin, ymax)
## coord. ref. : lon/lat WGS 84 (CRS84) (OGC:CRS84)
## source(s)   : memory
## names       :    lyr.1,    lyr.1,    lyr.1
## min values  : 0.013078, 0.027787, 0.063802
## max values  : 0.992684, 0.981563, 0.996077
nlyr(s)
## [1] 3
Create a multilayer SpatRaster from file
filename <- system.file("ex/logo.tif", package="terra")
filename
## [1] "C:/soft/R/R-4.5.3/library/terra/ex/logo.tif"
b <- rast(filename)
b
## class       : SpatRaster
## size        : 77, 101, 3  (nrow, ncol, nlyr)
## resolution  : 1, 1  (x, y)
## extent      : 0, 101, 0, 77  (xmin, xmax, ymin, ymax)
## coord. ref. : Cartesian (Meter)
## source      : logo.tif
## colors rgb  : 1, 2, 3
## names       : red, green, blue
## min values  :   0,     0,    0
## max values  : 255,   255,  255
nlyr(b)
## [1] 3
Extract a layer
r <- b[[2]]